Showing posts with label Tutorials. Show all posts

Thursday, July 23, 2015

Ribbon Scraps Hop With May Arts!

Hello!

Welcome to my stop here on May Arts' hop sharing ideas to use up some of those ribbon scraps you (meaning ME!) hate to throw away :-)

For a full list of hoppers, hop on over to the May Arts blog HERE---and don't forget to leave comments along the way.  We have 3 grab bags of new release ribbony goodness up for grabs!

Now, on with the project...

One of my all time favorite ways to use my scraps is creating rag bracelets.  It's quick, and a great way to put to use those scraps!


For this bracelet, I've used scraps of the 1.25" silk ribbon in white, 3/8" lace ribbon in ivory, 1" lace ribbon in white, and the 3/8" velvet woven ribbon in antique gold.  OH!  And I've thrown in a length of the 3 mm diamond chain for a little extra sparkle :-) 

I always have quite the stash of silk scraps floating around because who's throwing away silk??!


Since my scraps were on the smallish side (as scraps tend to be), I just used my sewing machine to stitch the smaller pieces into a length long enough to wrap around my wrist two times...


...and used a needle and thread to sew the chain to the end of the ribbon.  Velvet loops serve to hide the ends of the chain as well as providing me a place to attach my closure when the bracelet is complete.


Finally, I just machine stitched and hand stitched on the rest of my scraps, along with an assortment of vintage buttons, onto the original length of ribbon.  What you're left with is a shabby mix of silk, lace and buttons that I'm a fan of!


Here's a closer peek.  I just love the roughed up silk and the grunginess of the vintage findings together!  


Ok, guys, that's it for me.  I hope you've found a little inspiration here today.  Now go grab those scraps and get crafty!!

xx,

Thursday, May 28, 2015

Fly.

Hello!!

Today, I'm over on the Viva Las VegaStamps! blog with a fun tutorial to create a lovely, textured background.  If you want the details, hop on over and CHECK IT OUT!


Thanks for stopping by today!!

xx,

Sunday, April 12, 2015

Birds Of A Feather.

Hello!!

Today, I have a fun and simple set of canvases rockin' a serious pop of color :-)


I began by gluing down one of the pieces from the Birds On A Wire 2 set and the largest feather in the Feathers Shape Set with a small amount of tacky glue.  A quick coat of white acrylic paint and a little Mod Podge to seal it in and it's ready for color!


I've outlined the pieces with a water-soluble graphite pencil to make them stand out more.


I finished my canvases off with a few white circles drawn on with a white PITT pen...


...and a sprinkling of glass microbeads for a little sparkle!


If you'd like to see how this project came together, check out my video (COMING SOON!).

Gina's Designs supplies used:

Other supplies used:
8 by 10 inch canvases
white acrylic paint
Mod Podge
Lindy's Stamp Gang spray inks
General's water-soluble graphite pencil
Faber-Castell white PITT artist pen
Aleene's Tacky Glue
microbeads
May Arts 1 1/4" and 1/4" black silk ribbon

And that is that!!  Thanks so much for joining me today :-)


xx,

Sunday, December 7, 2014

Merry. A Hot Air Balloon Christmas Ornament Tutorial.

Hello!!  Today, I have a shabby and dimensional ornament (with VIDEO tutorial!) over on the May Arts blog!

Here's a peek...


It's super easy to make and looks amazing on any Christmas tree!  If you'd to grab the template I created for this ornament, you can find it HERE.  It's perfect for hand cutting or importing into your electronic cutting machine software for tracing to save your fingers some work.

Don't forget to hop on over to the May Arts blog to see my VIDEO TUTORIAL and get the details on all the supplies I used.

Thanks so much for stopping by today!

xx,

Friday, November 21, 2014

Lace Ornaments With May Arts!

Hello!!

Welcome, welcome to the end of our hop and my little corner of the blogosphere :-)  Today, we're hoppin' with May Arts to inspire you to create with those special kiddos in your life!

Yep---its all about the kids crafts.

And, as always, don't forget to comment on the projects you've seen in the last few days of this hop for a chance to WIN SOME YUMMY MAY ARTS RIBBON!!


Now, here's what I've come up with...

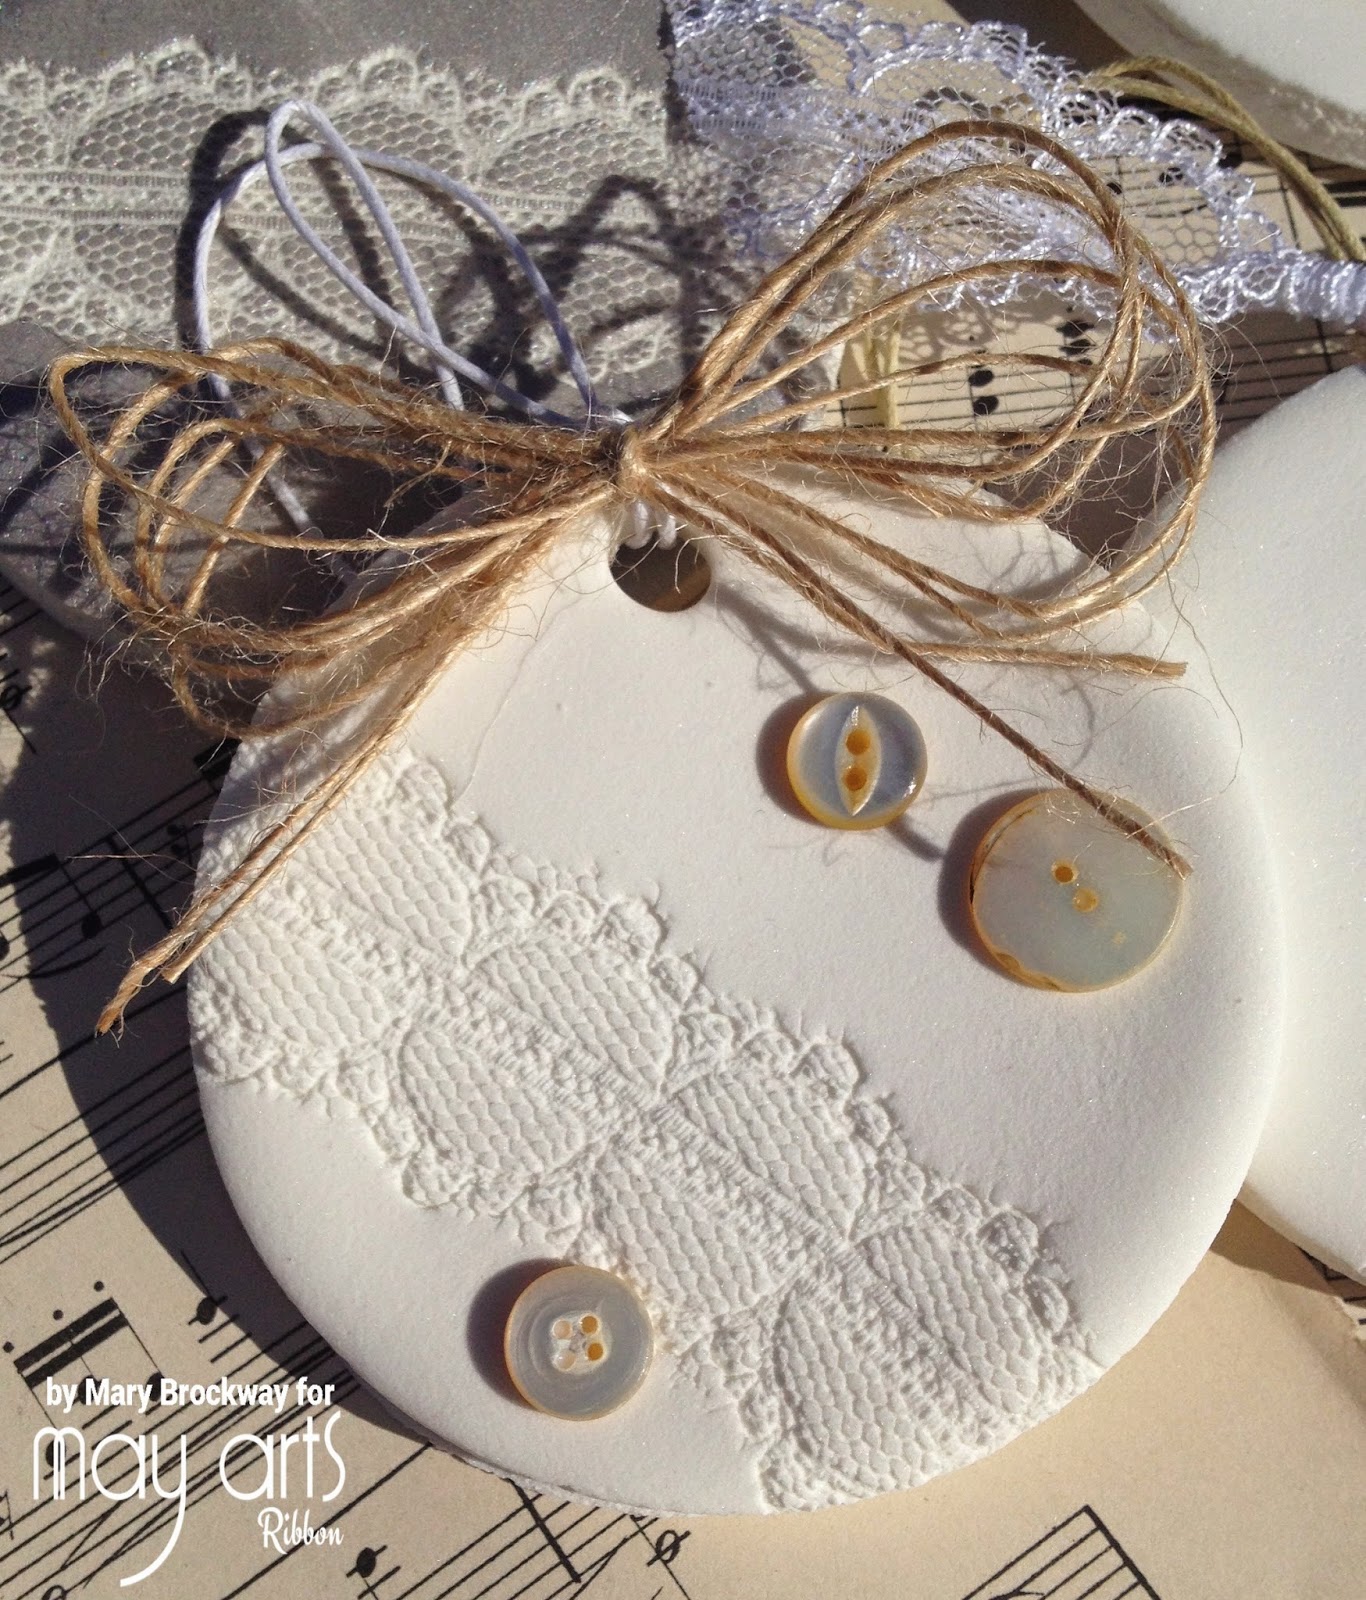
I stumbled along a fabulous recipe for a handmade clay and just had to give it a go.  It's a little bit corn starch, a little bit baking soda and a whole lotta awesome!!  Apparently, this recipe has been around for quite some time and it results in lovely, white ornaments that have almost a porcelain look.

Truly lovely!

Here's a peek at some of the ornaments my sweet baby girl and I whipped up using this soft, dreamy dough.


We've stamped each ornament with some super detailed May Arts lace, and embellished with our favorite ribbons/trims.  Love.

And the best part??

They glitter!!

Look at the lovely sparkle on our dried dough ornaments.  It's subtle and so pretty in person.  I've included the recipe below.


Here's my girls favorite.  Gotta love the girly pink, pink and purple!


And here's my favorite.  I guess we're not so different, after all :-)


This one was colored up with a bit of Delicata ink in Silver Shimmer.


Aaaaannnd, of course, I went a little shabby with some Natural String Burlap ribbon and a few vintage mother-of-pearl buttons.


This was definitely a fun adventure!  I think our ornaments are lovely and we had the best time playing with the dough and embellishing them when they were dry.  I can't wait to hang them on the tree. 

If you wanna see how these pretties were made in live action, take a peek at my video below!!


May Arts supplies used:

Other supplies used:
cornstarch
baking soda
vintage buttons from my stash

White dough recipe:
1/2 cup cornstarch
1 cup baking soda
3/4 cup water

Pour all ingredients into a medium saucepan on medium-low heat, stirring consistently.  Stir until the mixture starts to thicken and looks like mashed potatoes.

Remove dough from saucepan and put it in a bowl and cover with a damp towel.  Let cool approximately 30 minutes, until dough is at a comfortable temperature to touch.  Knead the dough thoroughly to get out any air bubbles.  Roll out dough 1/4" thick.

Cut out your shapes and let air dry.

Thanks so much for stopping by today.  I hope you've been inspired to grab your favorite kiddo, your favorite ribbon and get your craft on!!

xx

Tuesday, November 11, 2014

A Year In Review With May Arts and Core'dinations!

Hello!!  

This week, the ladies over at May Arts got to play with some amazing Core'dinations goodness.  We've each whipped up a little something to hopefully inspire you and we'll be sharing that with you all week---so, be sure to check back each day for more!

And there may just be a giveaway.

We're talkin' Core'dinations.

And May Arts.

Just sayin'.


Ok, now on with the show!

As we inch ever closer to 2015, I find myself looking back.  I love taking a peek at everything that's happened this year, and I LOVE seeing it captured in pictures---so, I found myself smack dab in the middle of my Instagram feed :-)


This mini book---inspired by my favorite insta-photo-sharing site---is filled with my top 20 moments from 2013.


I've layered May Arts wired burlap ribbon and Core'dinations cardstock in coordinating colors to create the camera cover.  A bit of sanding adds a more worn/vintage feel.

The rainbow stripes really help my title stand out.  Plus, who doesn't like a rainbow??

And finally, a hand full of sequins adds a bit of FLASH!  Hee hee.  Ya see what I did there?  Because cameras flash?!!?

May Arts supplies used:

Other supplies used:
clear craft sequins
Bind-It-All coils - 1 inch
Aleene's tacky glue
Thickers
Recollections heart punch

Alrighty, then!!  I do hope you've found some inspiration here today.  And don't forget to stop back in all this week for more May Arts and Core'dinations goodness.

OH!  And tune back in tomorrow for a video sneaky peek of how this project came together and a look at the inside this sweet little book.

xx,

Wednesday, May 14, 2014

Framed.

Hiya, Guys!!  Today, I'm over on the VLVS! blog with a fun, altered picture frame featuring Viva Las VegaStamps! and PanPastel.


I sooooo love how this frame turned out!!  That Gnome stamp ROCKS. My. World!!


And that sweet little heart rock??  A gift from my baby girl.  She's always bringing home random bits she's found while out and about.  LOVE!!


This Butterfly Specimen stamp is a new release over at VLVS! and it's definitely gonna get some use in my hands.


I'm all about choppin' up my stamps to better suite my projects, and this 'pure' from the Pure Imagination sentiment stamp is one of my all time fave slice-n-dices!  It's now super tiny and can fit into any nook or cranny.  If I want the whole sentiment back??  I just gotta piece that puppy back together, and I'm in business ;-)

Supplies Used:
Viva Las VegaStamps! stamps - Gnome, Butterfly Specimen, and Pure Imagination
PanPastel - Magenta and Hansa Yellow 
Thread, American Crafts jute, StazOn black ink, Dollar Store picture frame, vintage crystals, white craft paint

OKEE-DOKE!!

That is that for me.  If you wanna read all about how this puppy was put together, hop on over to the Viva Las VegaStamps! blog and check it out or you can take a peek at my little video run through below.


Thanks for stoppin' by!!

xx,

Friday, January 31, 2014

Book Of Hearts.

Hiya, Folks!!

Today, I come baring my heart...

Well, actually it's a whole book of them :-)  This month, as I was contemplating goals for myself in 2014,  I landed on the word 'heart'.  This little word can mean so many things!!

Sooooo, in honor of this years 'one little word', I've decided to art journal myself up a book of hearts to help keep my focus.

Keep these ideals in the forefront of my mind.

Keep my eyes on the prize!!!

Here's what I came up with...


It all started with a canvas base.  And lace...

Here's a peek at how I've created all that LOVELY lacey texture!!


Sweet, right?!??


I LOVE the amazing pop of color!!
That stitching makes me crazy happy :-)
And glitter.  DUDE!

I gotta say I'm pretty happy with my book of hearts.  I plan to create a page a month with a different take on the word 'heart'.  Hopefully, it'll help keep me on track and inspired to keep-on-movin' and shakin' towards my goals this year!
Thanks so much for joining me today!!  I'll see ya next time :-)
OH!!  And I'm playing along with the January Challenge over at Berry71Bleu.  It's all about one word.  Hop on over and play along!
xx,

Thursday, January 16, 2014

Imaginarium Designs and Lindy’s Stamp Gang Blog Hop

Welcome to the MASSIVE Imaginarium Designs and Lindy's Stamp Gang Blog Hop!
 
We are so excited to have the team at Lindy's and Imaginarium Designs team up for a full day of creativity. This hop will surely get your creative juices flowing, so head on over to all these incredibly talented crafters to check out how they’ve combined the beautiful products from Lindy’s Stamp Gang with Imaginarium Designs fabulous chipboard---it’s a match made in color heaven!

We have a great prize for you, too!
We would love for you to show some love to all our crafters and leave them a little message.
You will have the opportunity to win a fabulous prize by both ID and Lindy’s Stamp Gang so please let us know that you have done so by coming back to Lindy’s Stamp Gang and Imaginarium Designs blogs at the end of the hop.
Here's what I've created...
This little cutie is bundle full of notecards!!  Yep, inside is a set of 6 notecards and envelopes ready for gifting---'cuz who doesn't find themselves in need of a card now and then??
 
 These FAB chippies from ID make it perfect for an every day gift, or even a Valentine for someone special...
...and that LSG sparkle takes it over-the-top!!
 Here's a peek at how the notecards are stored inside.
 
 Aaaaannnd, a peek at the notecards themselves!!  I've stamped with a lovely heart chippy from ID and glittered it up to make the image pop.  A bit of Lindy's color adds a sweet, painterly look.
 LOVE!!
 
Here's a list of the Lindy's and ID product I've used:
 
Ok, that's it for me!!  Now, get hoppin' and I'll see ya next time!
 
 Below you will find the full list of incredible artists and their fabulous creations!
Evgenia Sokolinskaya - http://eva-inspiration.blogspot.ru
Julianne McKenna-De Lumen - http://julestheblingprincess.blogspot.ca
xx,