Wednesday, November 26, 2014

Learn.

Hello!

I've got a little somethin' somethin' over on the May Arts blog today :-)

Here's a peek...


If you wanna hear all about this little box and a bit about how it was created, hop on over to May Arts  and check it out.

Thanks so much for stoppin' by!

xx,

Friday, November 21, 2014

Lace Ornaments With May Arts!

Hello!!

Welcome, welcome to the end of our hop and my little corner of the blogosphere :-)  Today, we're hoppin' with May Arts to inspire you to create with those special kiddos in your life!

Yep---its all about the kids crafts.

And, as always, don't forget to comment on the projects you've seen in the last few days of this hop for a chance to WIN SOME YUMMY MAY ARTS RIBBON!!


Now, here's what I've come up with...

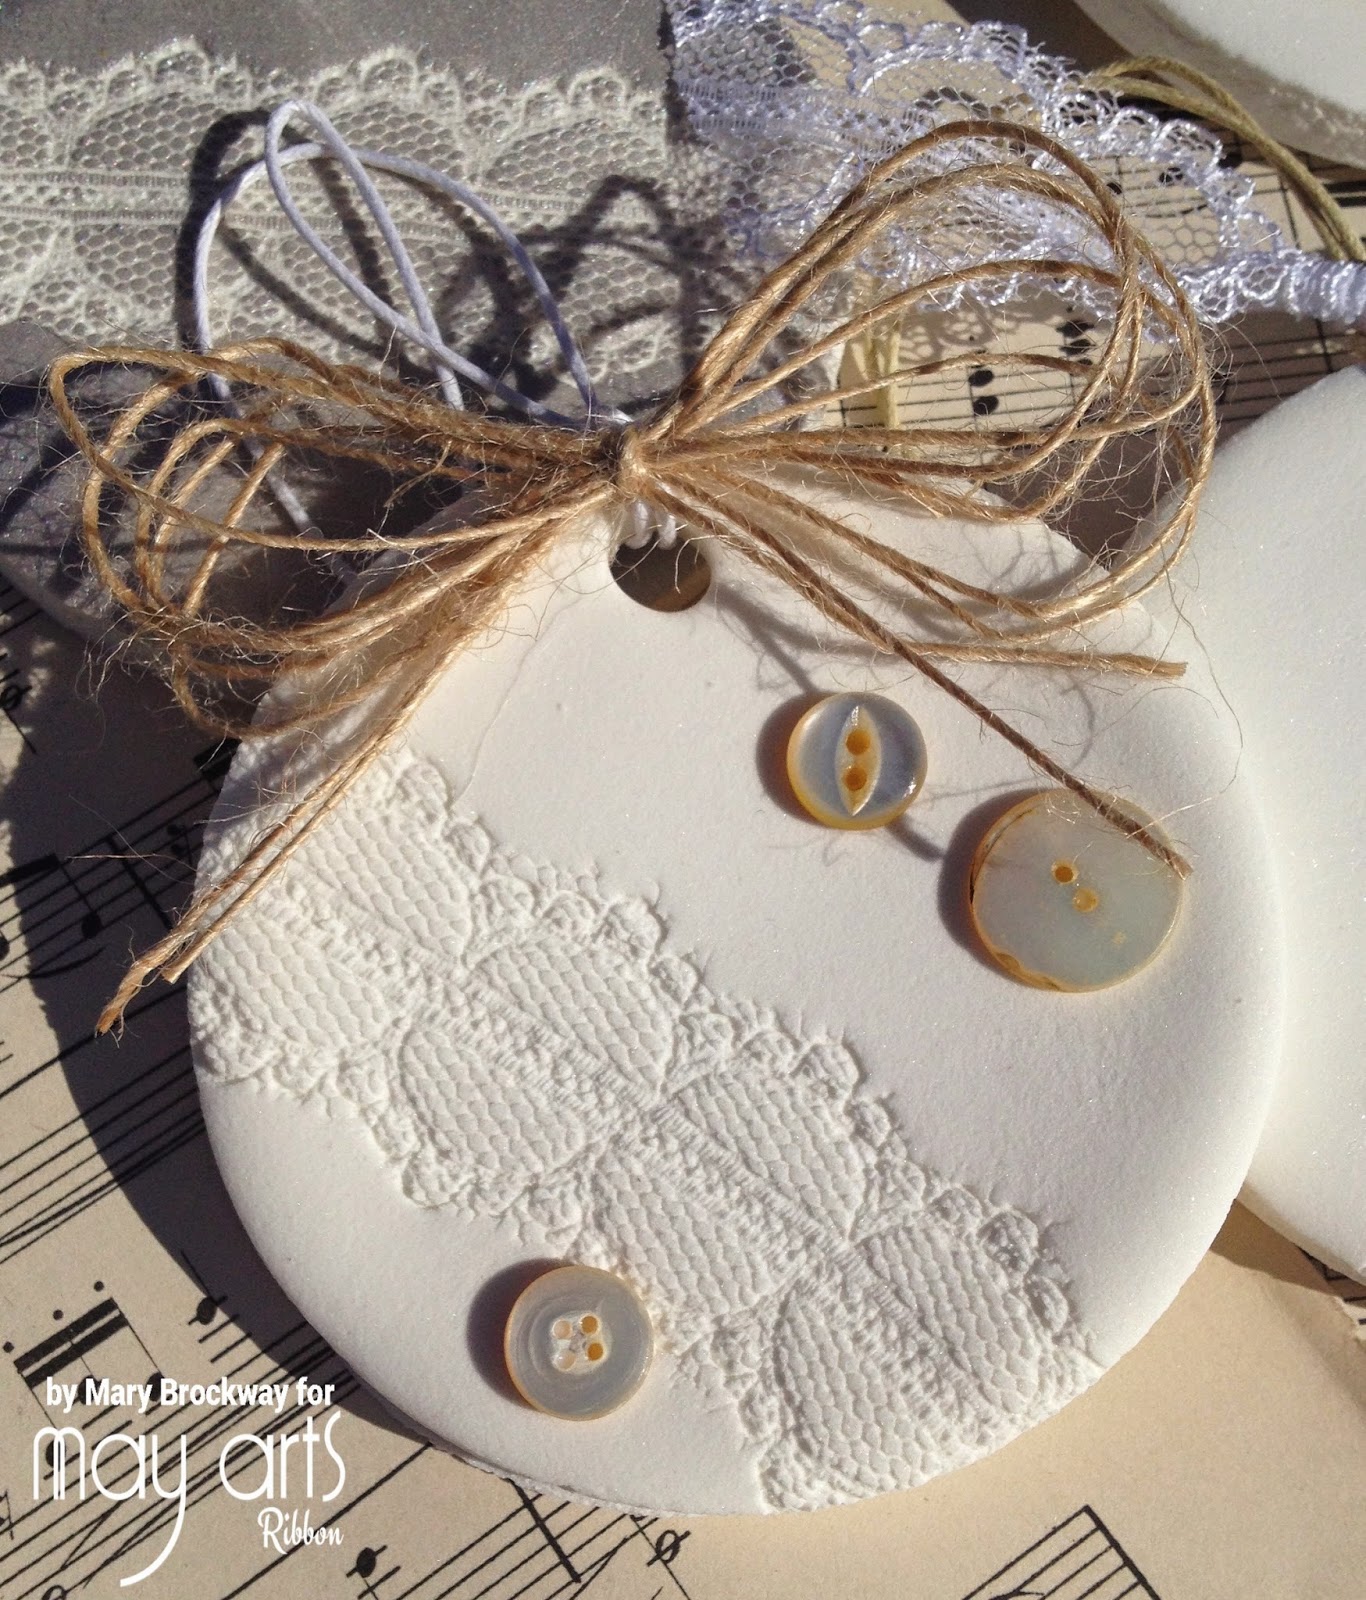
I stumbled along a fabulous recipe for a handmade clay and just had to give it a go.  It's a little bit corn starch, a little bit baking soda and a whole lotta awesome!!  Apparently, this recipe has been around for quite some time and it results in lovely, white ornaments that have almost a porcelain look.

Truly lovely!

Here's a peek at some of the ornaments my sweet baby girl and I whipped up using this soft, dreamy dough.


We've stamped each ornament with some super detailed May Arts lace, and embellished with our favorite ribbons/trims.  Love.

And the best part??

They glitter!!

Look at the lovely sparkle on our dried dough ornaments.  It's subtle and so pretty in person.  I've included the recipe below.


Here's my girls favorite.  Gotta love the girly pink, pink and purple!


And here's my favorite.  I guess we're not so different, after all :-)


This one was colored up with a bit of Delicata ink in Silver Shimmer.


Aaaaannnd, of course, I went a little shabby with some Natural String Burlap ribbon and a few vintage mother-of-pearl buttons.


This was definitely a fun adventure!  I think our ornaments are lovely and we had the best time playing with the dough and embellishing them when they were dry.  I can't wait to hang them on the tree. 

If you wanna see how these pretties were made in live action, take a peek at my video below!!


May Arts supplies used:

Other supplies used:
cornstarch
baking soda
vintage buttons from my stash

White dough recipe:
1/2 cup cornstarch
1 cup baking soda
3/4 cup water

Pour all ingredients into a medium saucepan on medium-low heat, stirring consistently.  Stir until the mixture starts to thicken and looks like mashed potatoes.

Remove dough from saucepan and put it in a bowl and cover with a damp towel.  Let cool approximately 30 minutes, until dough is at a comfortable temperature to touch.  Knead the dough thoroughly to get out any air bubbles.  Roll out dough 1/4" thick.

Cut out your shapes and let air dry.

Thanks so much for stopping by today.  I hope you've been inspired to grab your favorite kiddo, your favorite ribbon and get your craft on!!

xx

Tuesday, November 11, 2014

A Year In Review With May Arts and Core'dinations!

Hello!!  

This week, the ladies over at May Arts got to play with some amazing Core'dinations goodness.  We've each whipped up a little something to hopefully inspire you and we'll be sharing that with you all week---so, be sure to check back each day for more!

And there may just be a giveaway.

We're talkin' Core'dinations.

And May Arts.

Just sayin'.


Ok, now on with the show!

As we inch ever closer to 2015, I find myself looking back.  I love taking a peek at everything that's happened this year, and I LOVE seeing it captured in pictures---so, I found myself smack dab in the middle of my Instagram feed :-)


This mini book---inspired by my favorite insta-photo-sharing site---is filled with my top 20 moments from 2013.


I've layered May Arts wired burlap ribbon and Core'dinations cardstock in coordinating colors to create the camera cover.  A bit of sanding adds a more worn/vintage feel.

The rainbow stripes really help my title stand out.  Plus, who doesn't like a rainbow??

And finally, a hand full of sequins adds a bit of FLASH!  Hee hee.  Ya see what I did there?  Because cameras flash?!!?

May Arts supplies used:

Other supplies used:
clear craft sequins
Bind-It-All coils - 1 inch
Aleene's tacky glue
Thickers
Recollections heart punch

Alrighty, then!!  I do hope you've found some inspiration here today.  And don't forget to stop back in all this week for more May Arts and Core'dinations goodness.

OH!  And tune back in tomorrow for a video sneaky peek of how this project came together and a look at the inside this sweet little book.

xx,

Friday, November 7, 2014

Creating A Fall Tablescape With May Arts!

Hello!!
Today, I've collaborated with several of the fabulously talented ladies from the May Arts design team to dream up some inspiration for a lovely Fall Tablescape.

YEP!  We're each rockin' out a piece of the action---from a centerpiece, to name tags to anything you might need to create a stunning table for that special family dinner.

As for my piece of the pie??

It's ALL about the candles...


I've always gravitated toward a more homespun decor, so I decided to jazz up this trio of canning jars with layers of wired burlap ribbon, fall foliage and a few handmade blossoms created with silk ribbon that I've dyed that perfect shade of purple.

A bit of sand in the bottom and they're perfectly safe for burning candles, or skip the fire and go with a flame-less candle instead.


How fun is that baby corn??

And this silk ribbon flower adds a lovely pop of color to the mostly neutral color palette.


And finally, here's a peek at the two smaller jars.  These blooms are a bit simpler, but just as chic!

May Arts products used:

Other products used:
canning jars in various sizes
vintage glass pearls
Fall Foliage (leaves, corn)
Starburst Spray in Sweet Violet Purple Teal
Stickles Glitter Glue in Gold

I hope you've found a bit of inspiration here today :-)  To see what the rest of the gals have come up with, hop on over to the May Arts blog.

OH!!  And there may be a prize (or TWO DIFFERENT prizes of TWO SPOOLS each!) up for grabs.

Just sayin'.

xx,